Place the car on jack stands or ramps. While ramps are more convenient I find I have more room to work with the car on jack stands.
Disconnect the battery positive lead. Yes, the positive lead. Unless you want to practice your arc welding.
Remove the skid pan from under the engine compartment (M6 bolts - 10 mm socket)
For models equipped with a heat shield for the starter, loosen the two heat shield retaining bolts (M10) on the clutch housing using a 17 mm wrench. The bolts do not have to be completely removed.
Remove the small nut on the end of the starter and slide the heat shield off the stud on the end of the starter and off the two retaining bolts.
Disconnect the electrical leads from the starter and move them out of the way.
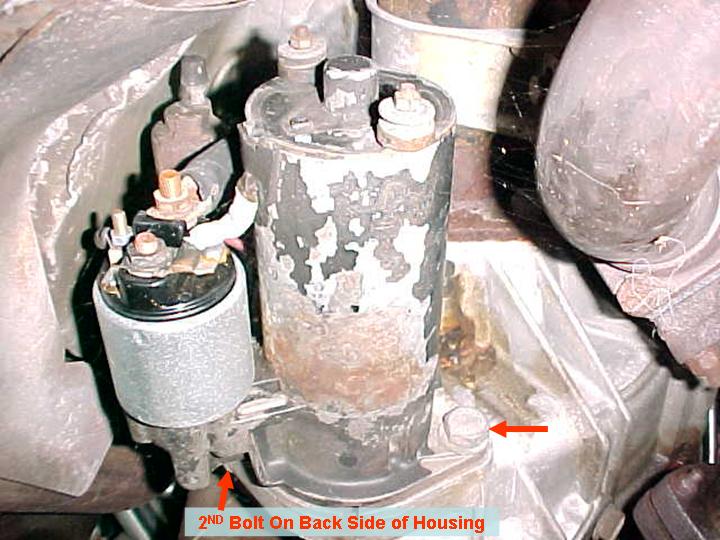
Remove the starter retaining bolts (M12) using a 19 mm wrench and then remove the starter from the vehicle.
Installation
Position the starter in the opening in the clutch housing. Install and tighten the two retaining bolts (M12) using a 19 mm socket or wrench.
Clean the electrical connector posts on the starter and the connectors on the electrical leads.
Attach the electrical leads to the starter.
If equipped with a heat shield, slide the heat shield on to the negative post of the starter and onto the retaining bolts on the clutch housing. Install the retaining nut on the negative post and tighten. Tighten the retaining bolts on the clutch housing.